The cross grain is the grain line that runs from one side of the fabric to the other. This is formed by weaving weft threads over and under warp threads, and it has more flexibility than warp / straight grain. The bias grain is created when fabric is cut at a 45o angle. When cut on the bias without control, this is the most stretchy' grain on woven textiles, and fabric can stretch out beyond recognition! When cutting straight pieces of cloth that will be joined, it is critical to cut them on the correct grain, which is usually the straight grain. This is due to the fact that there is very little stretch. This is the simplest approach for locating straight grain. Snip the selvedge of your cloth to tear it, then pick up a weft (cross grain) thread and gently tug it. This thread will gently collect your cloth, so proceed with caution. You can also use a fine crochet hook to pull the thread up, clip it, and then pull the new end. This is the second approach, although I typically avoid...
The cross grain is the grain line that runs from one side of the fabric to the other. This is formed by weaving weft threads over and under warp threads, and it has more flexibility than warp / straight grain.
The bias grain is created when fabric is cut at a 45o angle. When cut on the bias without control, this is the most stretchy' grain on woven textiles, and fabric can stretch out beyond recognition! When cutting straight pieces of cloth that will be joined, it is critical to cut them on the correct grain, which is usually the straight grain. This is due to the fact that there is very little stretch.
This is the simplest approach for locating straight grain. Snip the selvedge of your cloth to tear it, then pick up a weft (cross grain) thread and gently tug it. This thread will gently collect your cloth, so proceed with caution. You can also use a fine crochet hook to pull the thread up, clip it, and then pull the new end.
This is the second approach, although I typically avoid it because it can slightly distort the cloth, requiring you to'straighten' it! Ripping the fabric from the woven selvedge, on the other hand, will give you a straight beginning line, so it's worth considering!
One of the most crucial things to get right when sewing at home is cutting the fabric properly in the first place. Many projects have been wrecked by hurriedly cut cloth, with seams that don't match and what should be straight edges that are really unstable. When you master the fundamentals, the rest becomes lot easier, and the end result is more refined.
To avoid further shrinkage, use linen that has been prewashed. Other woven fabrics might not require prewashing. Because they keep their shape and don't wrinkle when cut, these heavier fabrics are easier to cut in straight lines. Ironing the fabric will make it easier to cut, especially woven textiles.
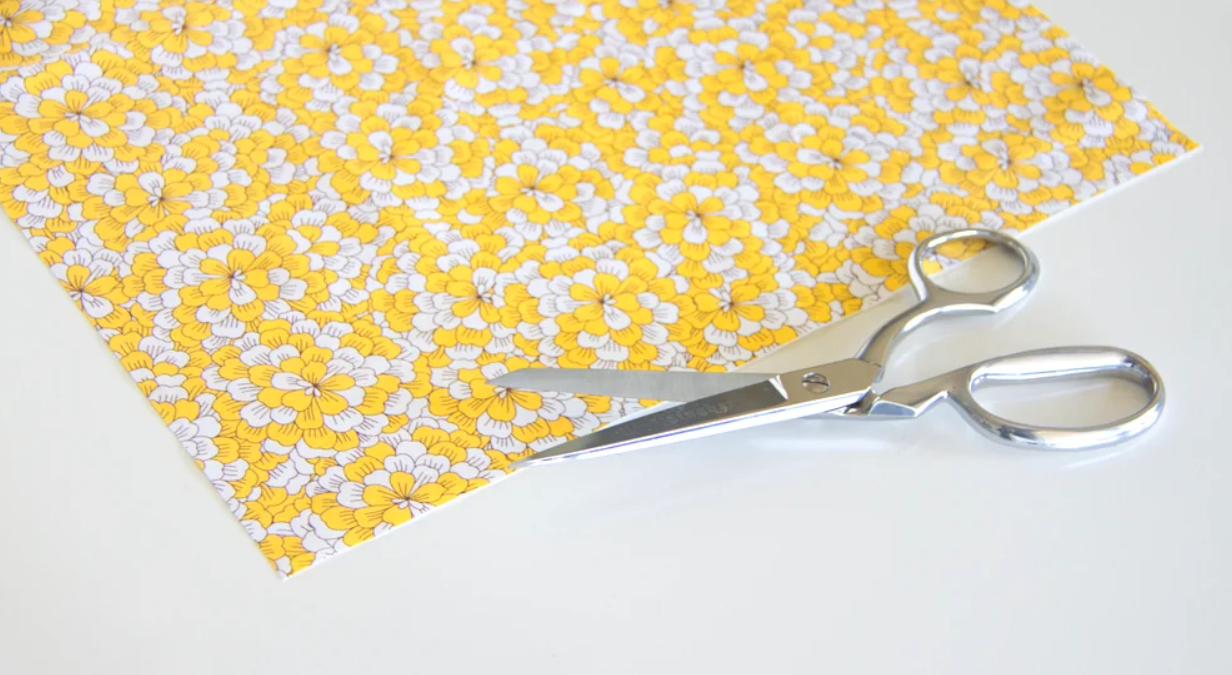
For cutting neat, straight lines, a sharp pair of crafting or dressmaker scissors is required. Avoid using your fabric scissors to cut other materials, such as paper, as this might dull the blade. A retractable knife can also be beneficial if the blade is sharp. If you're quilting, you may also use a rotary cutter.
You can begin pinning and marking your pattern pieces once you've squared off your cloth and have a straight edge to work from. Make sure your straight edge runs with the grain of the cloth, especially if you're using a patterned fabric.
Pre-washing and pressing your fabric, regardless of the purpose, is a fantastic practise to develop. This allows for shrinkage and allows you to press the fabric while looking for the straight edge or straight grain. Before you start doing anything, wash and iron the fabric flat. More about pre-washing and shrinking.
A flat platform that supports the fabric is required for accurate cutting. Keep the fabric's edges on the table's edge so that the main portion of the fabric does not drop or drag. The next step is to identify the best cutting surface. If your table is too small, you should cut on the floor.
The next step is to locate the first straight edge. All of the other cutting edges are guided by one straight edge. Begin by searching for the selvage. This is normally the straight edge of the fabric where it was held for weaving on the loom. Typically, the selvage includes perforations along its edge and may be printed with the designer's details and colour codes. Selvages are the fabric's uncut edges.
Examine the grain of your fabric. Is the straight grain running with the fabric's length and the cross-grain running with its width? The grain of the cloth, in conjunction with the straight edge, is critical for a pattern.
To cut properly and effectively, you'll need a decent quality rotary cutter, a self-healing cutting mat, and a transparent ruler. Rotary cutters come in various sizes, with the larger size being better for major projects and the smaller size being best for minor cuts or navigating around curves. For most jobs, a 45mm cutter is recommended.
There are also different sizes of rulers. Choose one that is appropriate for the type of cutting you intend to conduct. If you can accumulate a variety of ruler sizes, you will have a choice. Try a non-slip ruler as an extra tool and to make your cutting easier. The most critical aspect of your ruler is that it is clear and strong.
Fabric weights and a protective glove are also useful tools. The rotary cutter is essentially a round sharp blade, similar to a wheel. It can readily thrown out of turn. A protective glove is an excellent approach to protect your hand. When using a rotary cutter, remember to push the blade away from your body as you press into the fabric. Keep your blade near the ruler and use it as a guide.
Before you begin, cut across the cloth and square off the cutting edge at the top of the piece. Match the cloth length to the selvage running down your cutting board. Take the bottom corner and diagonally fold it to match the top of the fabric. The selvage will lie in a straight line across the top of the cloth if you take the bottom left corner to the top right corner. Cut across the top of the fabric using this line as a guide.
Line your transparent ruler across the cloth from one marked line on the mat to the corresponding mark on the opposite side, using your designated cutting mat with grid lines. This produces a straight cutting line if the fold and selvages are aligned with the straight line of the cutting board.
If you have this ruler, it can help you cut straight cloth edges, especially if they are part of a lengthy piece of fabric that needs to be measured numerous times. After the T square, slide the ruler down the fabric while keeping the top and sides at a 45 degree angle.
Comments
Post a Comment